Websockets and Soundcraft
Part 1
Introduction
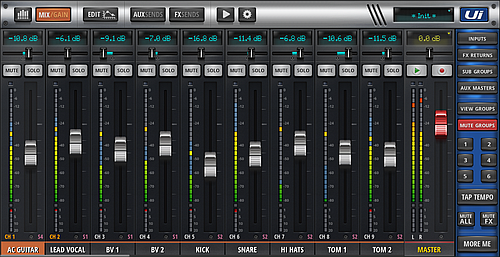
Digital mixers in the Soundcraft UI family have the nifty feature of not needing a special app to control them, you can handle them through a user interface in your web browser. The mixer takes over the role of a web server. Thus, you don't have to worry which device you use to connect to it or what OS, and what version of it, your device might have installed. All it needs is the ability to go into the WWW.

Browser and mixer talk to each other via websockets. This being a standardised method of communication, you can talk to your mixer without the standard UI. Many instructions in the net use separate modules and programs to achieve this, yet you can simply do it using pure Javascript. This will explain the first steps needed to achieve this.
HTML
So let's first code a simple web page, in which our Javascript will run:
<!doctype html>

<head>
<meta charset="utf-8">
<title>JS Websockets Soundcraft UI</title>
</head>
<body>
<h1>Websockets for Soundcraft UI in Javascript</h1>

<h2>Channels</h2>
<p id="info" style="min-height:10em;">
</p>

<script type="text/javascript">
<script>

</body>
</html>
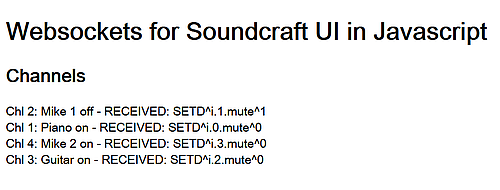
This basic page contains a paragraph named info, in which we will display information from the mixer. Below that we will add our Javascript.
Javascript
First we are calling the mixer via its ip address. In our example it uses the address it gets when we use the wifi the mixer provides. If you have yours set up to use an existing network, change the address correspondingly.
const socket = new WebSocket("ws://10.10.1.1:80");
In the next lines we begin reacting to messages we receive and also sending one.
z = 0;
socket.onmessage = function(event) {
  if (z == 80) {
    socket.send("3:::ALIVE");
    z = 0;
  } else {
    z++;
  }
}
Unless our mixer keeps getting 3:::ALIVE messages, it will close the connection. You could write a time-based loop for this, here we wait for 80 messages received, which works quite as well.
At the end we put functions that write into the console log in case of errors or if the connection is lost:
socket.onclose = function(event) {
  console.log("Connection aborted.");
};

socket.onerror = function(error) {
  if (error.message == undefined && socket.readyState == 3) {
    console.log("No connection established.");
  }
  else {
    console.log("[Error] " + error.message);
  }
};
Now let's add to the beginning of our code and define instruments for the first four channels, to make our example a bit more realistic. Then we can start to handle the data we are receiving.
var instruments = ["Piano", "Mike 1", "Guitar", "Mike 2"];
var channels = [];
socket.onmessage = function(event) {
  if (z == 80) {
    socket.send("3:::ALIVE");
    z = 0;
  } else {
    z++;
  }
  received = event.data;
  console.log("RECEIVED");
  receivedLines = received.split(/\r?\n/g);
  receivedLines.forEach(line => {
    if (line == '2::') {
      socket.send(line);
    }
    else if (line.search(/SETD\^i\.\d?\.mute/) > -1) {
      line = line.replace('3:::', '');
      ints = line.match(/\d+/g);
      if (ints[0] < 4) {
        channels[ints[0]] = ints[1];
        channelstate = (ints[1] == 0) ? "on" : "off";
        info = document.getElementById('info');
        info.innerHTML += instruments[ints[0]] + " " + channelstate + " - RECEIVED: " + line + "<br>";
      }
    }
  });
};
The messages received we split at the linebreaks received.split(/\r?\n/g) then we treat line by line. The original user interface of Soundcraft UI reacts to every line 2::: by sending the very same message (Ping-Pong). Here we recreate that behaviour, even though we do not really need it. As mentioned above, the connection is kept alive by sending 3:::ALIVE.
In our example we are looking through all the other lines for the mute settings of the first four channels. The mixer will send them in the format SETDi.0.mute.0 In this i.0 is channel 1 (input) counted computerstyle and mute.0 describes the state of the mute button. 0 means not pressed, so our channel is active.
We are interested in these two numbers in the message. First we have to get rid of the beginning of the line, because it also contains a number: line = line.replace('3:::', ''); Then we can get the numbers ints = line.match(/\d+/g); The ints array now contains two elements, i.e. a channel number and its mute state.
For each of the four instrument channels in our example, we can then find the state, which of course is the opposite of the mute state. This we combine with the original message from the mixer for our entry in the paragraph info.

Download
If you want to test this but do not want to write all the code yourself, you can download this file.
Part two
In a next part we will have a look at how to change these settings with our code.
Part 1 - Part 2
 blechtrottel.net